Woven by Grace: crafts
Image and video hosting by TinyPic
Showing posts with label crafts. Show all posts

Monday, January 23, 2017

Weekend Adventures: Chalk Art at Not Your Average Joes

Life never ceases to amaze me, especially in the last few weeks. Though it seemed like a coincidence, I'm sure it wasn't and I'm grateful. 


If you live in Woodbridge, VA or know much about Northern Virginia we are known of course for Potomac Mills Mall, but also a sweet spot called Stonebridge Town Center. It's perfect for walking around or finding a bite to eat with friends, just a really fun place to go anytime of the week. Well one of our favorite spots to indulge in is Not Your Average Joes. From the industrial lighting to the smooth relaxed scene, Mike and I love eating there with and without the boys! 

Well earlier in the week we met the general manager and in our conversation I shared how I teach secondary art. Well it turned out they were looking for someone to redesign their chalkboard menus! So Saturday I spent the morning into the afternoon doing just that! It was an incredible experience - I mean truly it was. 


I can't thank Not Your Average Joes for allowing me to share one of my passions! Of course in honor of my new adventure I want to celebrate with you! So check out my Facebook page on how to enter for a $50 gift card courtesy of their wonderful staff! When you go, please be sure to check out the menu boards! 

Saturday, November 1, 2014

Weekend Adventures: Harvest Carnival and Child Heroes

Halloween is one of those "hot topics" that each year as Kai gets older I think of what will we do as a family? As a child I trick or treated until I was around seven or eight and there was a huge sweep of concern about candy being tampered with and then as my mom became involved in church it was deemed "Satan's holiday." I'm sure some of you can relate and it was really a damper on my day when I no longer could get candy by the pillow case load...

So now that we're parents and I've had time to really come to my own conclusions about any and all holidays - Mike and I decided the best approach is the same way we do anything. Either we give it a purpose or we explain why we do something else...but we will always see it as an opportunity to serve and learn!

Our church hosts a Harvest Carnival each year and this year we helped out. Since we agreed no costumes I made our shirts! If you've been around long enough you know that Kai is obsessed with Yo Gabba Gabba! So He was beyond thrilled to be his favorite heroes in the whole world! Praise God for felt and it's magical wonders ha.


Mike even loved his shirt and joined in on the fun! I had a blast making the shirts and am looking forward to doing something special each year. I hope you had a wonderful time with your families and had tons of candy!!


Tuesday, October 21, 2014

Our Nest: Craft Room


I haven't had a chance to sit down much and write which is frustrating since my hands have been so busy crafting and cleaning up this space (among many others!). I've been fighting off cold after cold for the past month to no avail! I love being able to keep up with posting, because as a fellow blog reader myself I really enjoy reading new content on a regular basis - so for that I'm terribly sorry friend... I've just been knocked off my feet!

In my efforts of keeping to my word of the year (remember that post) I decided to slow down on always wanting more and use what I have to furnish our home with as little purchases as possible! I love to craft, however, my craft space was a DISASTER with no real rhyme or reason after we moved - and not in the crafter inspired type of mess...it was just a total mess. So to clear my head and get myself moving despite feeling yucky, I started working on the space little by little. And I'm so glad I did! I did toss quite a bit, but only because I know that I can't keep everything.

Finally with the space clean and ready to work I can't wait to create and craft new things. What do you love about your crafting space? I'd love for you to share yours!


Monday, May 19, 2014

Bird's Eye D.I.Y.: I AM Jar

Kick off your week with this fun and simple craft you can make with your little ones that not only encourages them, but also allows you to share and shape their identity. Several weeks ago I did a small support group with a co-worker for children we work with and we created "I Can's." Each child designed a can and wrote down all of the things they can do! It was bittersweet to see some children able to fill their cans and watch as others struggle to list a handful of capabilities. So I figured to do a twist on that craft and create an "I AM" Jar (plus my husband threw away my can by "accident"...). This is a great way to help your child share who they believe they are AND to reaffirm the wonderful things about them.


What you need:
  • A jar or can
  • Scrap paper
  • Address label 
  • Scrap yarn (optional) I made small yarn balls as a filler
  • Sticks (I used lollipop sticks I had leftover from another craft)
I made the flags out of extra scrapbook paper I have and address labels, which I always keep on hand. However, you can simply use scrap pieces of paper and fill your jar without the flag concept. Here is how I created the flags:

Place your address label with a portion of it hanging off of your scrapbook/decorative paper.
Write your I AM statement - notice the lip of the label. Cut out your flag!
Fold your extra piece of the label around the stick
Ta-da! You have your flag!

You can create a ton of statements that when your little one is feeling down they can go to their jar and remind themselves of how amazing and great they are! I have ours now sitting right on our shelf in the living room. Mike even joined in with a few statements of his own. Creating an environment where you celebrate and embrace the positive aspects of who you are will only allow your children to thrive. I'm constantly reminded how important my own self speech is and how that even sets the tone for Kai's development of who he will see himself. Make your own jar, it's a lot more fun than you will even realize!


Saturday, April 19, 2014

Eggs, Candy, and Surprises


This is my fun pinata egg I created (fourth time is a charm...) after checking out this fun tutorial. I couldn't find some of the items the original recipe calls for (liquid starch and water balloons) when I went to the store so I improvised and I'm still pleased with the technique around it. I was able to create several eggs, but this one came out the best! This is a TWO DAY project, so if you're trying to whip one of these up give yourself some time.

Here are some tips: This is basically paper mache at its finest, so don't worry about liquid starch. You can use a simple glue and warm water mixture or even Modge Podge mixture as a substitute. Make sure to have several layers of tissue paper to add to the strength of the egg (coverage is key). I also used regular balloons and found them to still give the "egg" shape. Also when adding your string cut ACROSS the top of the egg where your opening is. I made this mistake on my first three eggs (oy!) and didn't realize you need to cut specifically across so when you go to close the egg it retains its shape.

Don't throw away your misshaped eggs! You can still use them (I am a firm believer in re-purposing all things). You can cut them in half and stuff them so the contents show (see the finished basket). I think they really are going to be a hit! Kai saw the ones I was working on and went crazy! I can't wait to give him his basket tomorrow.


Tuesday, April 15, 2014

Easter Basket Madness!


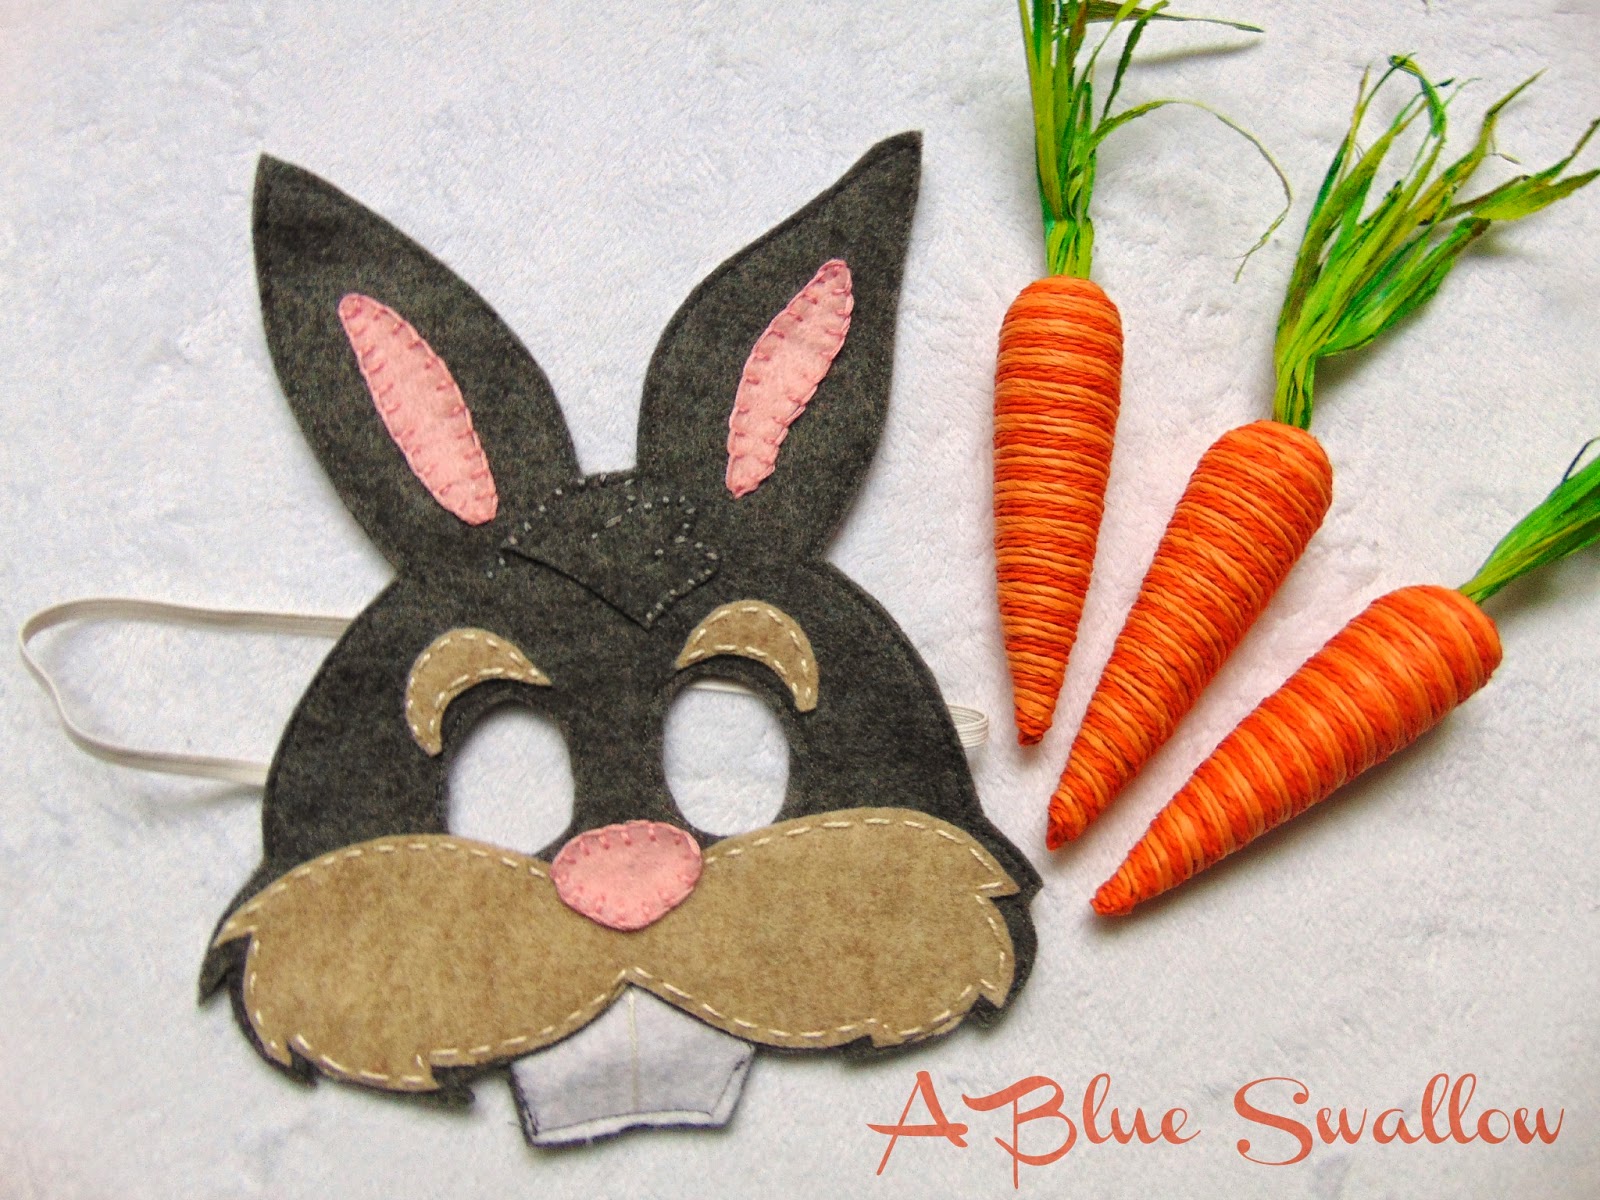
As Kai gets older I'm really starting to enjoy the fun of putting things together such as Easter baskets. I love how he enjoys playing pretend now and I've admired so many masks as of lately, but of course waited too long to order one. So in efforts to whip one up, I looked online everywhere for a mask template to really not find many. I found this one online (it's been adjusted for the correct size for a toddler) and pieced it a part with felt. I'm so pleased with out it turned out!

Felt is such a great medium to use for masks since it's flexible and durable. This project cost me about $1.50 with the felt I purchased and I used embroidery floss for the details.

 Here are some tips! Note that when piecing your mask together, I did use glue to tack the different layers prior to sewing it. The back of the mask is one full piece of felt. For the eyes I free-cut those since I wanted to make sure they were large enough to see out of. I would recommend machine sewing the front and back parts of the face together while sandwiching the elastic in between. Also, measure your child's head for the elastic (I almost forgot!).

I really think it's going to be a wonderful addition to Kai's basket. Up next are some fun paper mache eggs that I found on this blog! Super easy and I love that you can customize them. I will be sure to share how those turn out since they are the next project!


What are you favorite gifts for your baskets?


Saturday, March 1, 2014

Conquering the Weekend


Overnight I have a toddler. I went from cuddling to maybe a half an hour of play to full on playtime followed by one long nap. I had fallen into a bad case of "I'm tired, so let's just play and then watch a television show" blues... Working outside of my home during the week throws me for a loop on the weekends. What do I do? and sometimes just counting the minutes until nap time. I wish I could say that I have a million mind stimulating crafts at my fingertips ready each weekend, but I don't. However, I don't want to use being tired as an excuse either. So I've been on Pinterest! Simply because you can pretty much find anything you're looking for. I started a board just for crafts I could do that are age appropriate for Kai and keep him entertained on many levels. So I pulled out some paints and butcher paper along with some household items (cotton balls, clothes pins, coffee filters, and straws) and this is what happened.


Kai almost had a melt down while I was trying to set it up for him this morning and played for a full hour! We named colors and drew shapes. The clothespins holding the cotton balls are a genius idea and made it that much easier for Kai to handle the paints rather than paintbrushes. This activity didn't cost me a penny and we had a blast! I'm looking forward to actually using what I pin on the weekends and steering more away from less engaging activities. Do you have any fun activities for toddlers? I'd love to know! Send me a pin and/or let me follow you on Pinterest!

Have a great weekend!


Wednesday, February 19, 2014

Less is More

This past weekend was full of house projects! I guess when you're home for five days you finally rearrange and clean your home. It was definitely needed. We even changed up Kai's room (pictures to come). 

I used to have a craft room and I loved it, but it was always a disaster. I mean in the creative process I don't have time to clean (it's a terrible lie), but my main excuse for keeping the door shut on a regular basis. So in coming to grips that we could better utilize the space, Mike created this new craft space for me! About 4/5 trash bags later (I'm such a hoarder), a trip to Target and Ikea, and lots of organizing it's here. I am enamored with the space and more so with the fact it looks like it's always belonged. 

The desk I had gotten from a yard sale, the rack is actually a headboard from IKEA, and different things I've picked up over time. But the best part is my chair...


This chair is an actual antique Singer sewing chair (with original tags) that was reupholstered and gifted to me for Christmas from one of my best friends Regina. The top of the seat comes off for extra storage as well. This chair is stunning and I hope to pass it to my daughter one day.


In my case as a secret hoarder, less is more. When Mike and I got married our apartment was completely full of my stuff and he only had a rack full of clothes! But this space probably means so much to me, simply because Mike has been saving pictures from Pinterest to create it... 


Friday, January 24, 2014

Bird's Eye D.I.Y.: Household Salt Scrub

For Christmas we were gifted with handmade sugar and salt scrubs from a dear friend of ours. I had asked her how she made them and if I could share on my blog, because my feet felt...let's just say very shameful until I used some a few weeks ago. I really had no idea how simple it was to make your own scrub, until she told me. 3 basic ingredients that I'm pretty sure you have in your home right now! Of course if you Pinterest "how to" there are plenty of great ones available as well, this is just my version.

With Valentine's Day coming up this is a great gift along with a few other goodies without going all out, but looking like you did. Such as creating a coupon book to add to this, or a bar of soap and other bath essentials for a "getaway" box... just a thought.

Here is what you need:


A mixing bowl, Olive Oil, Coconut Oil (or Grapeseed Oil), Container (this is a pint size jar), Roughly 1 1/4cup of Coarse Sea Salt (you can also use Sugar or Kosher Salt)

Directions:

1. Pour your Sea Salt into the mixing bowl
2. Add the Olive Oil roughly a little less than a cup
3. Add 2 scoops of Coconut Oil 
4. Mix - I prefer the small clumps of Coconut Oil, it just gives the mix some texture.

* You can also add Essential Oils for aroma along with their health benefits*

Finally pour the mixture into your container and...


You're done! 

This is such a quick and easy gift that you can whip together with what you have at home. You can easily substitute and add your own twist to the mixture. I've seen scrubs with herbs, actual crushed peppermint, and a bunch of other things. Just make sure whoever you are making the scrub for doesn't have sensitive skin. I like to keep it simple, because I tend to breakout in a rash (just FYI). I can't wait to make a few more variations to give out for Valentine's Day.


Friday, January 17, 2014

Friday Night

It's finally Friday and to celebrate I decided to actually switch at least one thing in our routine up. So I made bathtub paint! The recipe is extremely quick and the supplies are less than $10. I was tagged in a Facebook post - so I figured I would give it a try. I think it was a hit (even though we had to taste test it first...)


All you need is:
  • 1 tbsp of Cornstarch
  • 4-6 pumps of Baby Shampoo
  • 2-3 drops of your choice of food coloring
  • 1-2 tsp of water
The consistency is nice and thick and this makes just enough for one time use. I used an ice tray because it was able to float while he played with the colors. No worries, all the ingredients are baby safe and don't taste like much but soap (yes I made sure to taste it myself). It was a nice switch up for the evening and definitely something I will be adding to our Friday bath times!