


As exciting at that can be, it is most certainly overwhelming figuring out how you want your home to look. For some time I've enjoyed finding items either in thrift stores or even on the side of the road to either refurbish, re purpose, or unfortunately toss. Budgets are tricky and since currently I don't have a sponsor for home repairs (Lowe's I'm available) I've learned that purchasing quality is everything... ESPECIALLY when thrifting! As yard sale season is upon us and the thrift bug has hit many of us, I've learned many lessons about picking out quality furniture and comparing cost to quality. Though I won't cover that here I wanted to mention it, because when I stumbled upon this dresser on a "freecyle" Facebook group I'm a part of I knew I had to take a risk!

This dresser was headed to the dumpster very soon due to no space and I knew it had potential. So of course waiting "patiently" in line to see if we could scoop it up I started figuring how was I going to refinish it? I have previously dabbled with chalk paint and found it was great, but can be tough to keep from chipping, scratching, or showing signs of wear relatively fast. So with a bit more research I tested a method of my own. I adapted my chalk paint recipe from I Heart Nap Time Blog. It was a bit of trial and error, however I hope to walk you through my steps!

When refinishing furniture you want to use either a semi-gloss or satin finish.
I personally prefer satin. The color I used is called "Afternoon Tea"
by Valspar. You also will need to sand any loose pieces of the
furniture. This was a bit tricky because I realized the dresser had
laminate wood, so using the previous paint I knew would be to my
advantage - but I smoothed out the peeled paint.


This is where you create your chalk paint mixture.I used this as my priming base for the dresser. This is an option and a great one at that instead of traditionally stripping, priming, and then painting older furniture.


Mix in approximately 3 table spoons of water - make sure that your consistency is still thick, but not runny or chunky.


Now to add your paint. I added approximately (I eye this, I do not measure) 1-1.5 cups of paint to the mixture just created (Plaster of Paris & water). Make sure that you mix this really well. I coated the entire dresser about 2-3 times to get a true coat over the entire piece. Allow for drying between coats!


Finally after the chalk paint mixture dried, I coated the entire piece 2-3 times with the pure satin mixture of paint. This not only sealed the piece along with the finishing wax I used, it provided the shine finish that chalk paint does not. Traditionally with chalk paint you seal it with finishing wax - but I find that finishing wax is just helpful when you have kids around... I am so pleased with the results!

and of course the finished product!

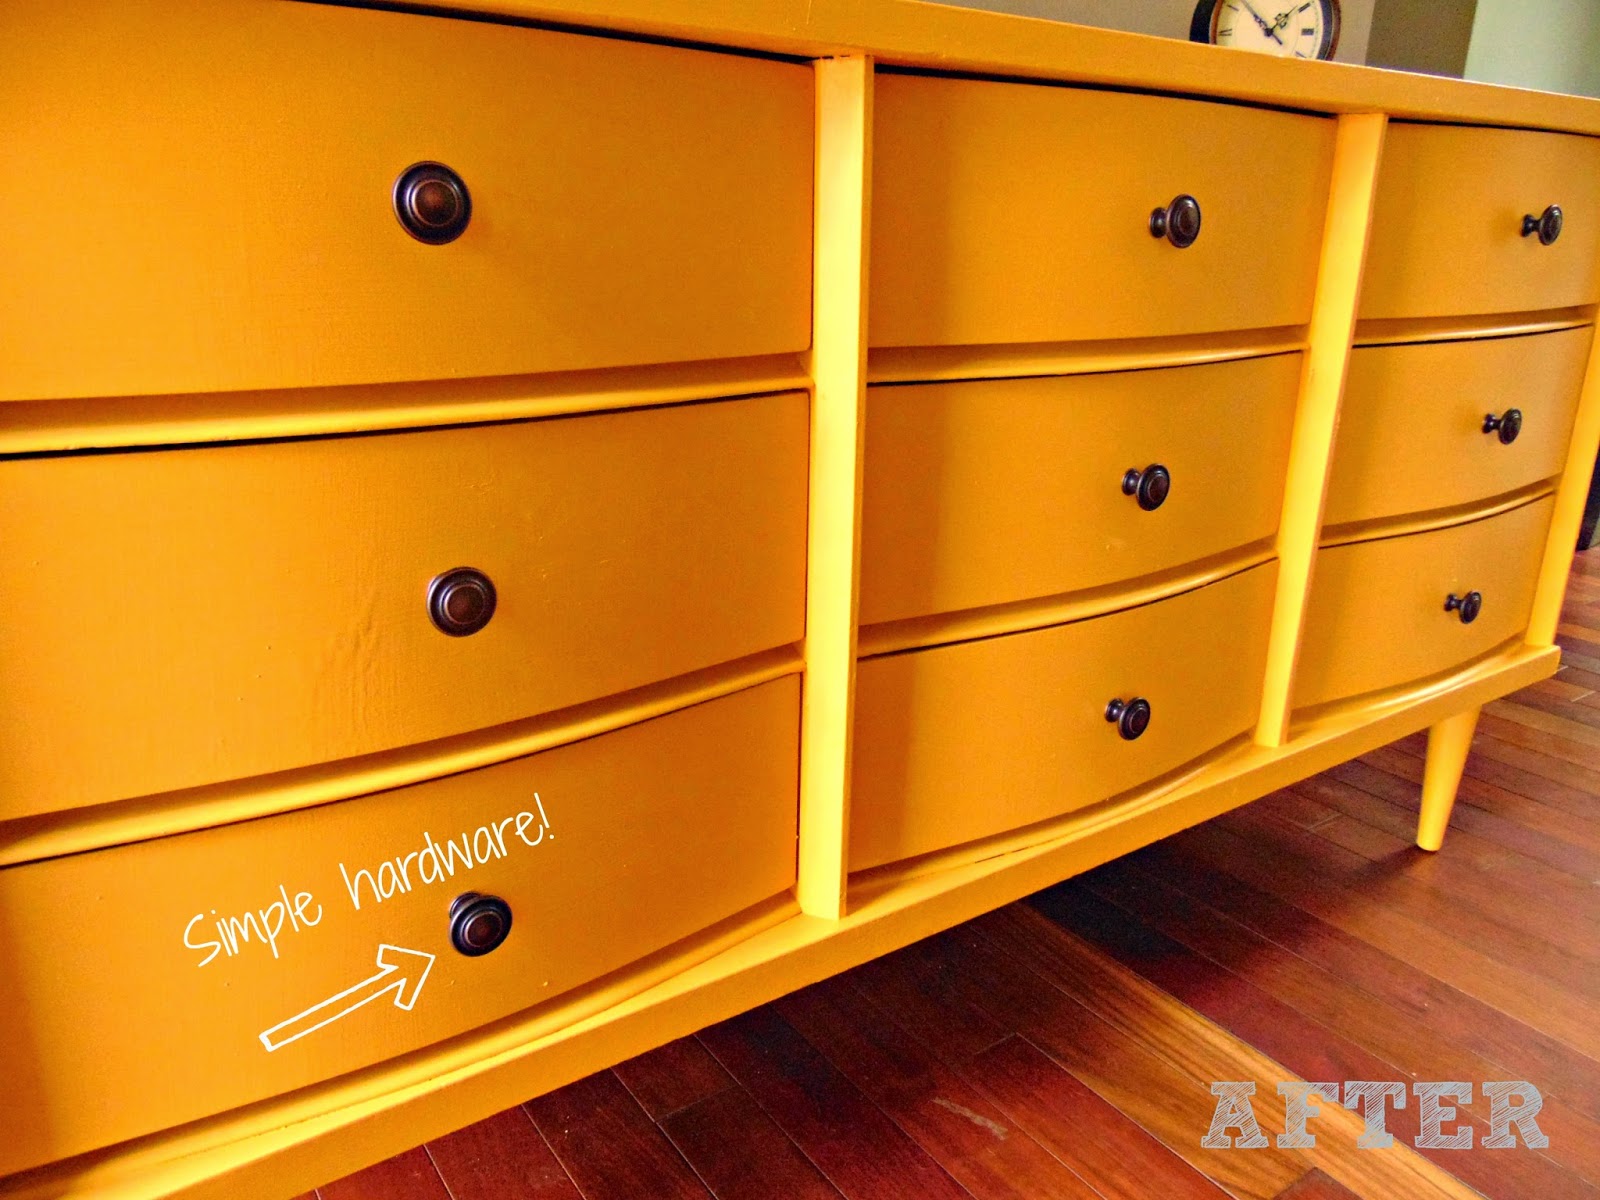
With simple hardware and a new coat of paint, this piece is exactly what we were looking for! I hope that this helps you in future refinishing adventures with your own great finds! As always I am testing and improving what I do with each piece, so hopefully this is a step in the right direction for you and keep checking back for any new tips!


No comments:
Post a Comment